I just realized I never posted pics of the car all back together and back on the road. So here come a massive pic dump. I finished the complete project in just over 12 months and got the car back on the road and registered in October 2021, just before hibernation. Since then I managed to drive 1000miles with no real issues.
Even though the progress was slower during summer and holiday season, I’m super happy to report that I’ve driven the first 5km to test everything. The carbs need a bit of tweaking, the brakes need a proper bleeding and some other minor stuff. But I’m super happy of where it’s at. Exactly 1 year and 23 days after I started disassembling the car. 1 year and 23 days to do a complete nut&bolt resto myself (except body work). Every part, nut and bolt on this car was either cleaned, painted, coated, renewed, changed, modified,… So here are a few pics of the last months in chronological order:
Custom heatshield for the Fujitsubo header. New gaskets everywhere,…Didn’t go with the usual blue engine paint, as it doesn’t go very well with the safari goldLonely driver spark plug wire separators and Datsun Spirit MSD spark plug wiresLong block ready to be put back inLong block ready to be put back inEngine inAdded the Garage Theory strut barIn good company. My 70 240Z, my 73 240Z and my ex KE25Engine and gearbox all mountedRear diff, suspension and fuel tank mountedJust missing the airbox nowInterior completed. Datsun competition steering wheel, Tomei shift knob for the KA14 gearbox, Speedhut tach, Cobra RSR seatsThe underbelly in all it’s glory! I could look at this all day long
Another motivation milestone: the engine is in. Just the engine, no ancillaries, no gearbox, no… Just needed to see it in there. Stay tuned for the June recap soon…
So every time I go to the car shelter to work on project Tosbo I decide what type of work I want to do that day. Interior work, mechanical work, body… You get what I mean. Therefore you won’t see a real strategy in my reassembly process, but doing it like this I keep me motivated to continue and invest quite some hours to do it right. #dontstopuntilyouareproud
First task was to clean and restore as much as possible of the original vinyl and reinstall it. Like the sills, rear boot area, door cards.
Refitting some more stuff under the hood, Inspection light fuel filter and regulator, voltage regulator, wiring loom, fresh air ducts all back in place
Bought a new Bosch “red” coil to go with my 123 dizzy. Sanded it down an painted it black for the more subtle look.
Wrestled the hood torsion bars until I finally got them back in place
Disassembled, media blasted, cleaned, greased, assembled and mounted the wiper linkage
And how about this for a big motivation booster. I took a day off and reassembled all of the subframes, suspension and steering just to have the car back on its wheels. What a full day well spent!
While having the car on the lift I realized the freshly painted and perfectly aligned fenders needed to come back off so I could install the new rubber seal and foam underneath
Another afternoon was spent to mount and align the bumpers
The rear of the car is now almost completely back together. Even the plate is back on. It’s a combination of 1970 and S30 wich gives you 70530 or TOSBO. That’s how this project got its name
Staying with the rear of the car I glued the last pieces of sound deadening, cut an felt insulation mat to match the contour of the trunk mat and fitted both of them. Looks so nice the early style DCW carpet.
After months I finally picked up my S13/14 – 240Z 71C hybrid transmission. A guy from Germany built it for me. And due to the pandemic and being 6+ hours away from me, travelling to pick it up wasn’t that easy this year. But it’s finally with me now.
Way faster was the delivery of my new Fujitsubo header and exhaust. After having fitment issues with the complete exhaust on my other 240Z, I decided to spend the extra cash and buy the Fujistubo for this project.
In the next post we should see some progress on the engine clean-up and assembly. No engine rebuild or optimized engine for now. I need to recover from all the expenses so far before I can build my dream engine for my dream Datsun 😉
So as the shell is back home, the reassembly can finally begin. This whole process will take loads of time, as I’m stillgoing by the motto: No part will be mounted back up without touching it to make it better, newer, cleaner,… Just out of tradition I started with the most random part possible. The first thing I saw on the shelve was the fuel filler neck, so back in it went.
Next thing were brake hard lines and some elements in the engine bay
Gave the car it’s identity back with some of it’s badges
Mounted the aftermarket JDM/EU taillights to see how they turn out
they turned out awesome
Started fiddling with the interior sound deadening
paper templatesI do like the result
Mounted the fuel tank
More interior work
Dash back in
Started the reassembly of the doors
Head loghts back in. Need to finalize the wiringEven though the fenders need to come off again, I saw the rubber flaps on the shelve and screwed them on.
I still don’t have a “plan” on how I’m going to proceed the reassembly until it’s all back together. Right now it’s a matter on what parts catches my eye, what is half way logical to mount first, and what is pleasing me that day to see mounted back on the car. Wiring looms are 90% back in, horns are back in, pedals and master cylinders are back in…
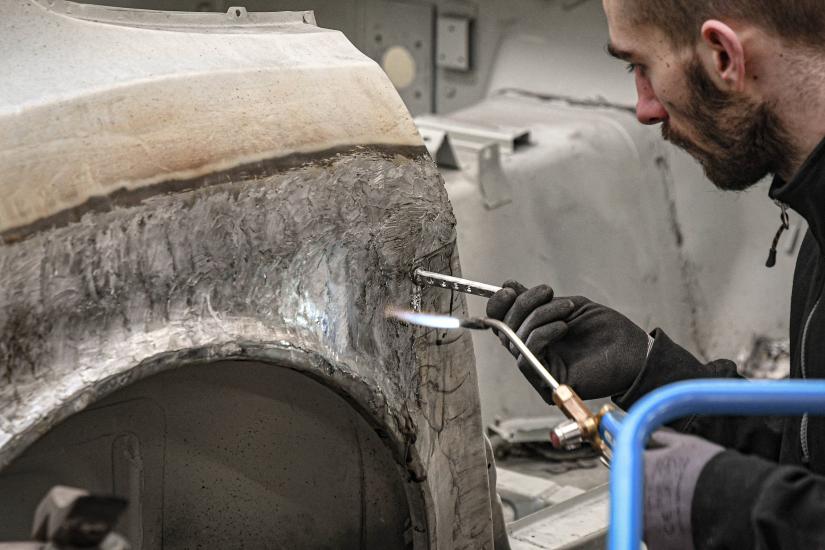
This is it, the big one, the bodywork post. All the metalwork and some paint. Before I start, let’s just say I’m super happy I found those guys! Check out their instagram @slgclassiccars. Their work is just on another level! The whole process was very pleasant for me as a client. There were no problems, only solutions. I’ve always been updated. Got photo documentation multiple times a week! No down times, once they start the work it won’t be in the corner of the shop for weeks without any work carried out,… The finished car just blows my mind! I highly recommend this resto shop!
So if you guys are interested in what was done to the bodyshell, the following pictures document the awesome work of SLG classiccars. Just pure craftsmanship! No repair panels / patch panels were purchased. They just created everything from scratch! All in all, this complete process took a little over 3 months. From delivering the empty shell to the bodyshop to the day it was finished.
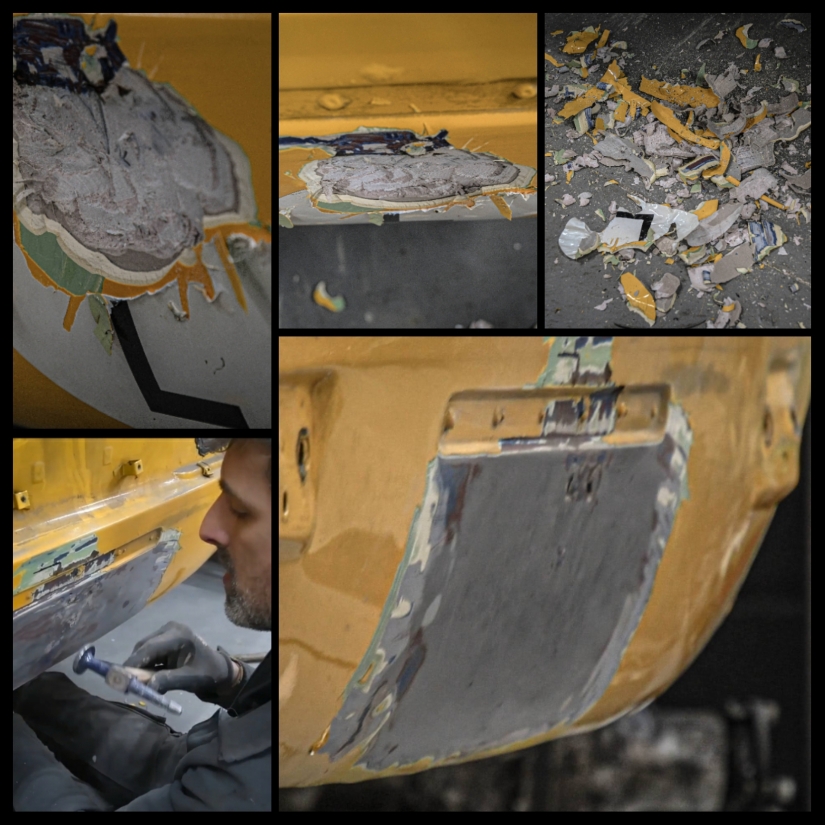
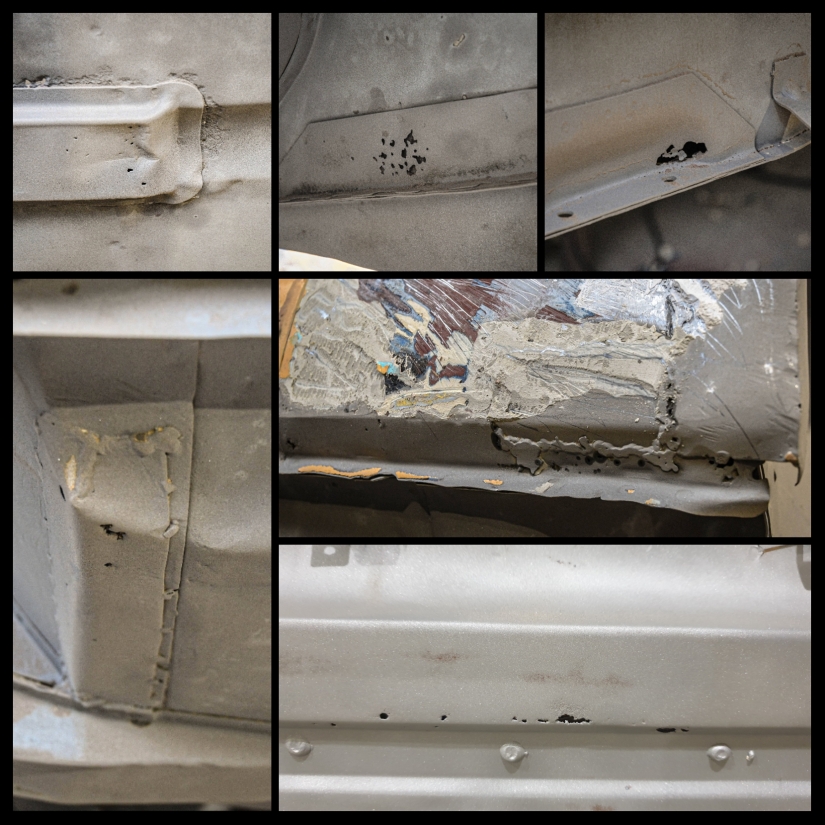
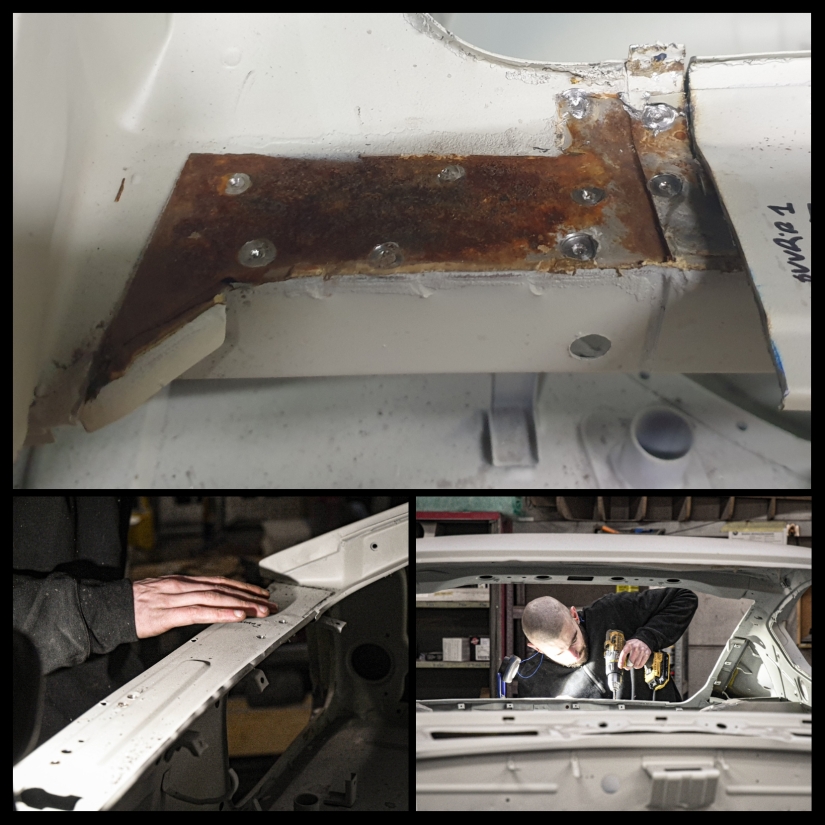
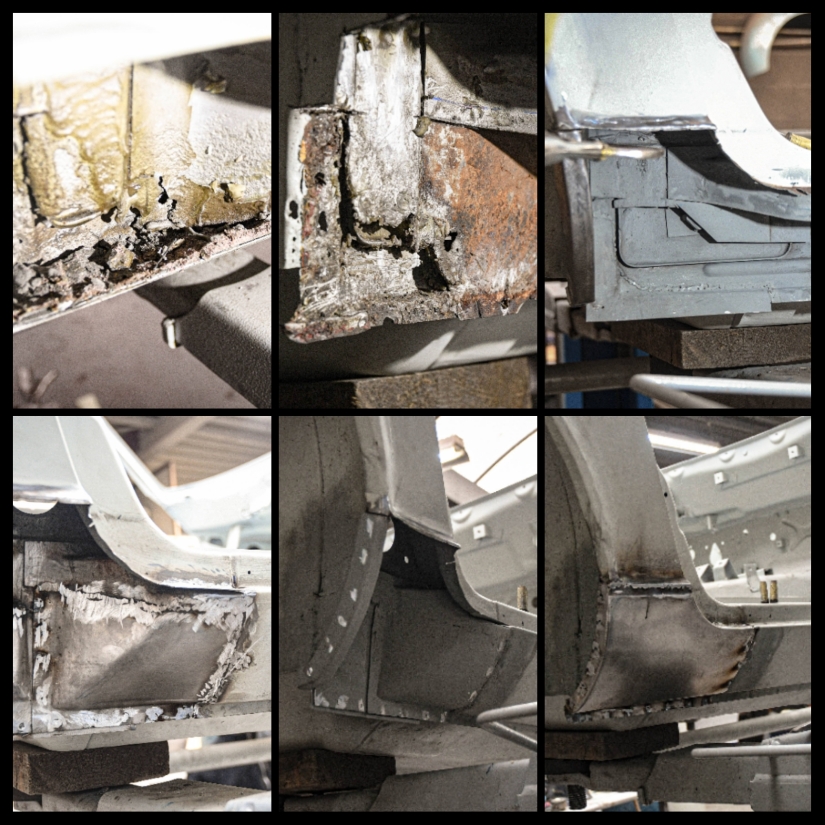
So even before the shell went off for media blasting the guys @ SLG started to work on it. A shitty repair job of the rear valence was redone the right way, the side marker holes were closed, the holes in the firewall for the AC lines were closed.
Shortly after the car was out of the bodyshop for 1-2 weeks to be media blasted. Right after the blasting process it was immediately put in epoxy primer to prevent any oxidation / corrosion. Of course the blasting process revealed some new flaws
But the team at SLG classiccars repaired them all
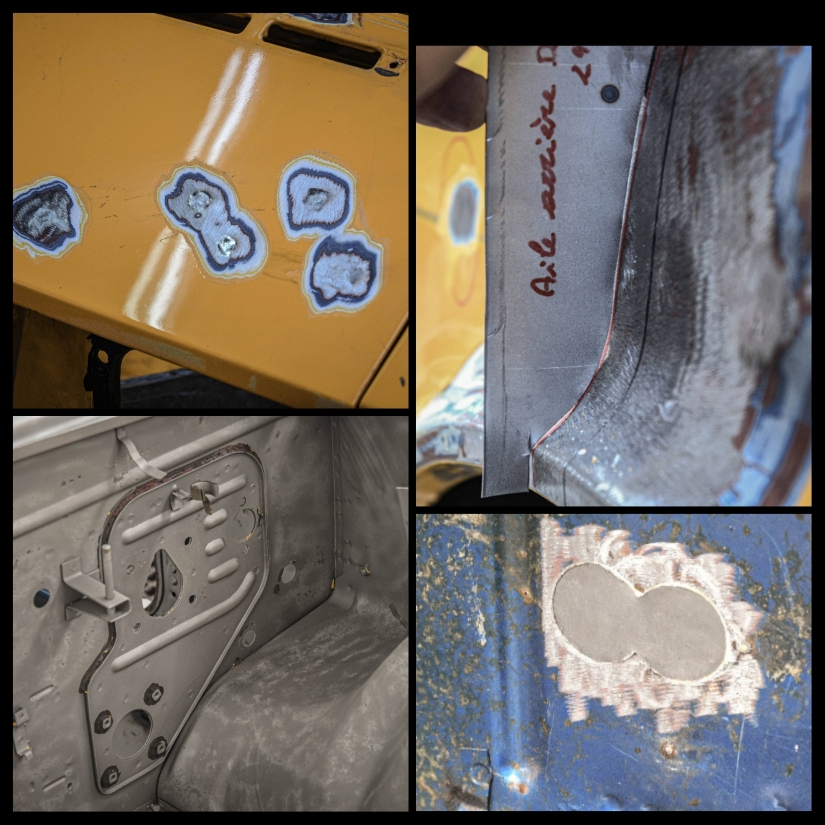
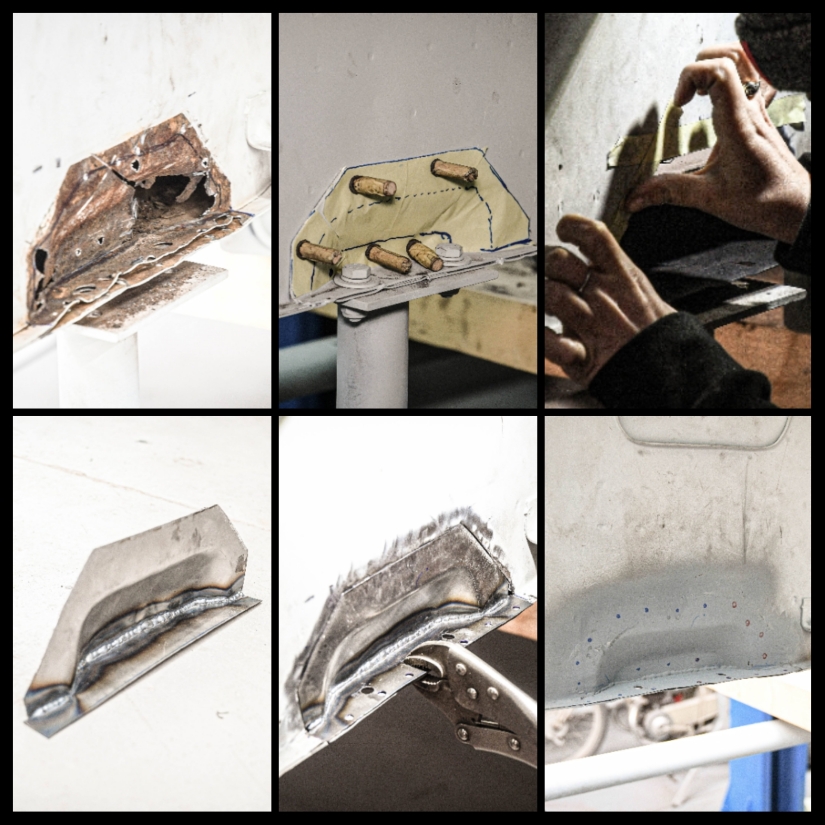
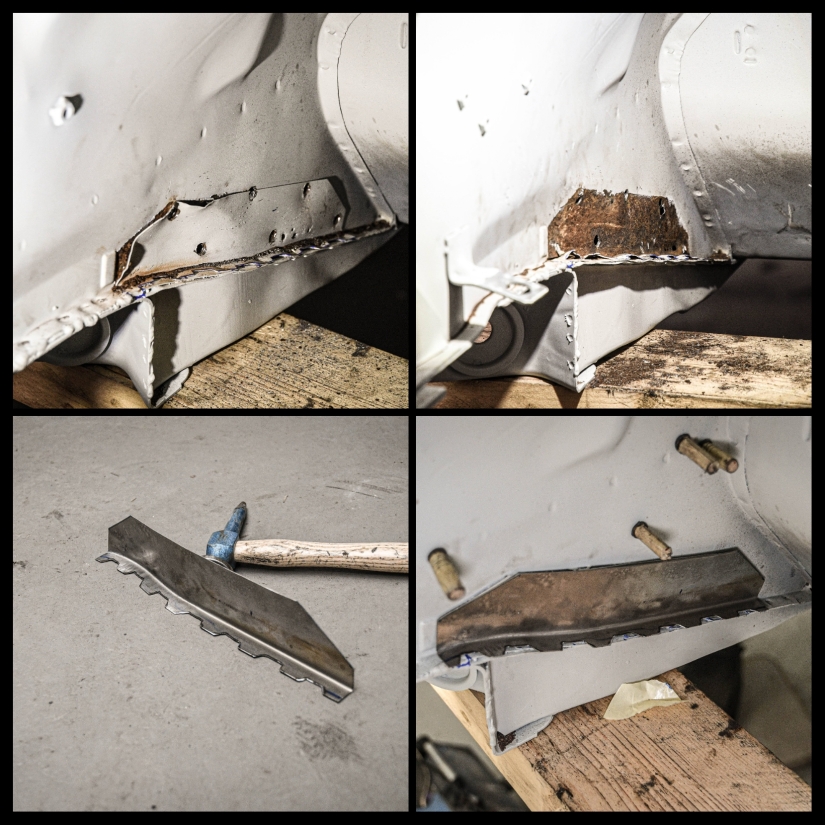
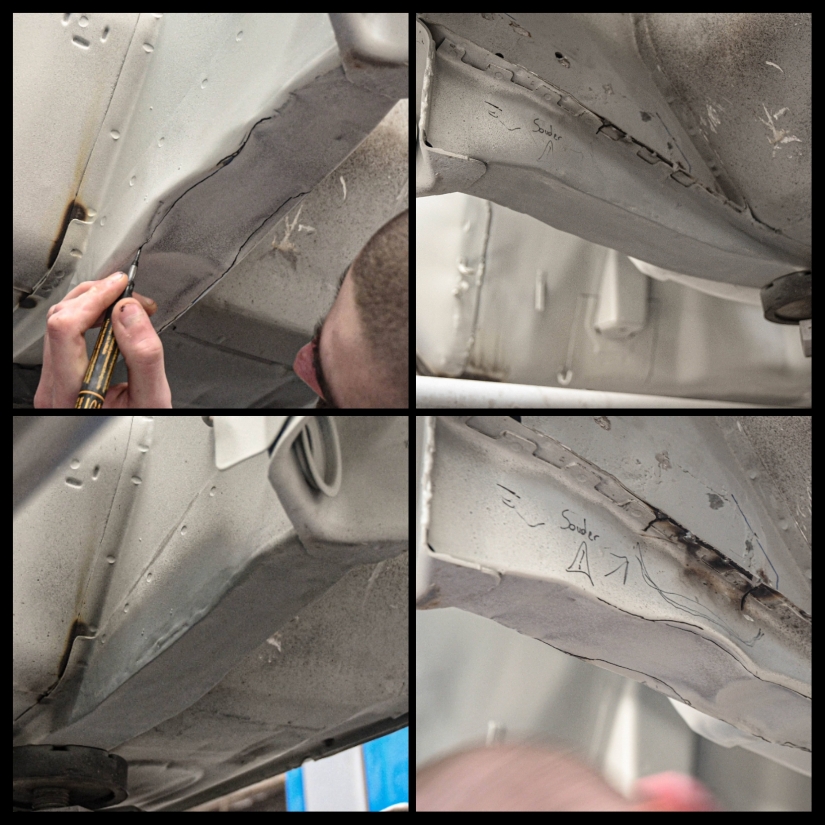
There is always rot behind these reinforcing panels
New from scratchSmall repair on the frame rail
Repairing the repair. More floorboard actionBoth corners were redone. It’s the Datsun his most favourite rust spot!
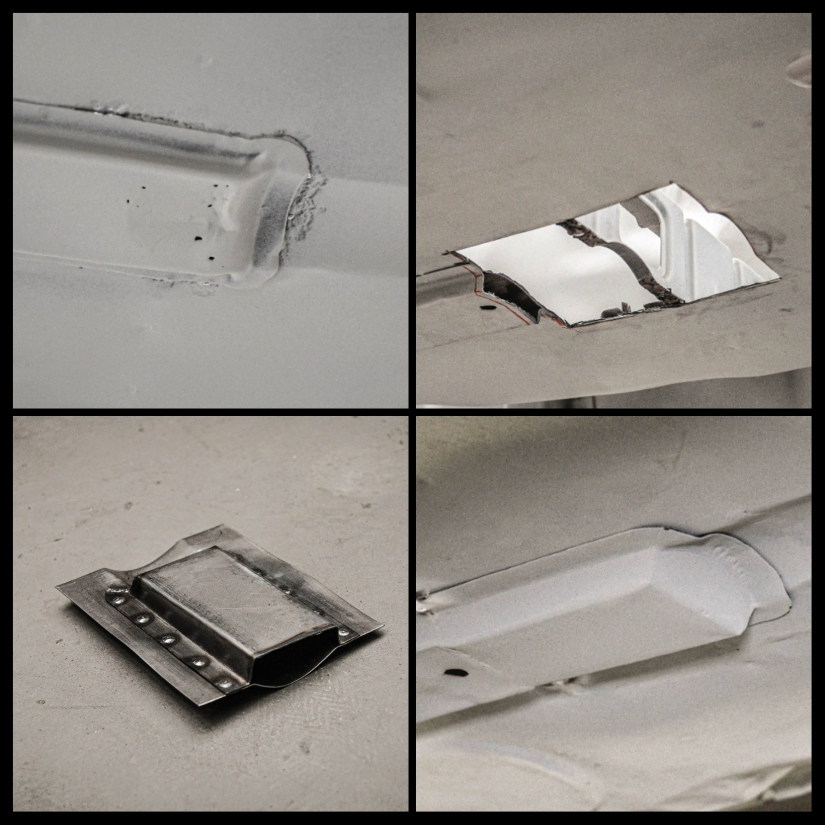
Just as the doglegs, another classic
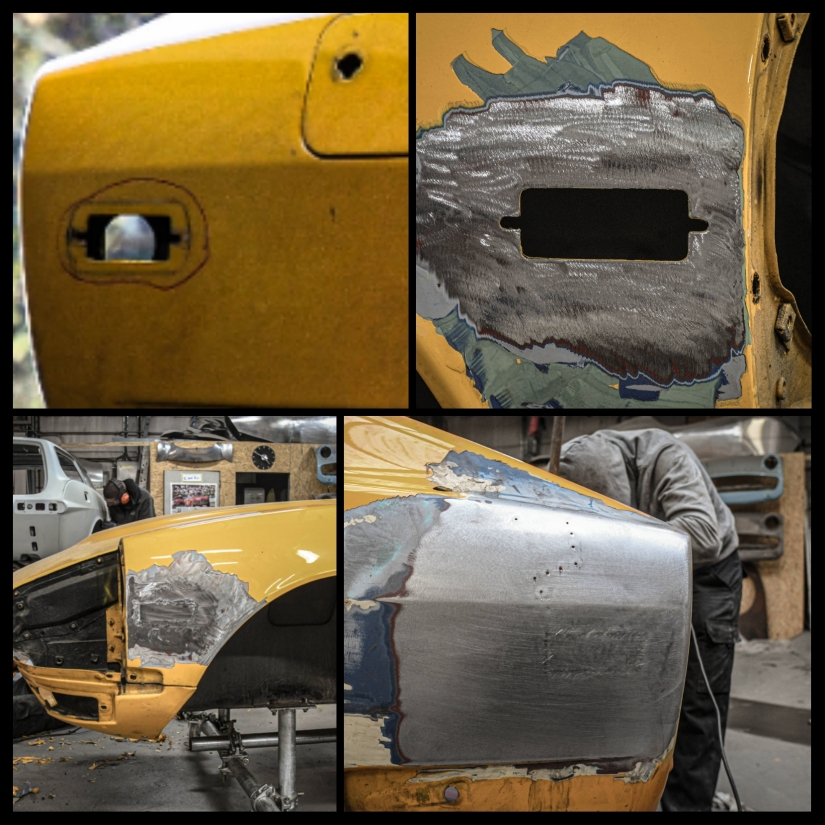
More repairs around the rear valence
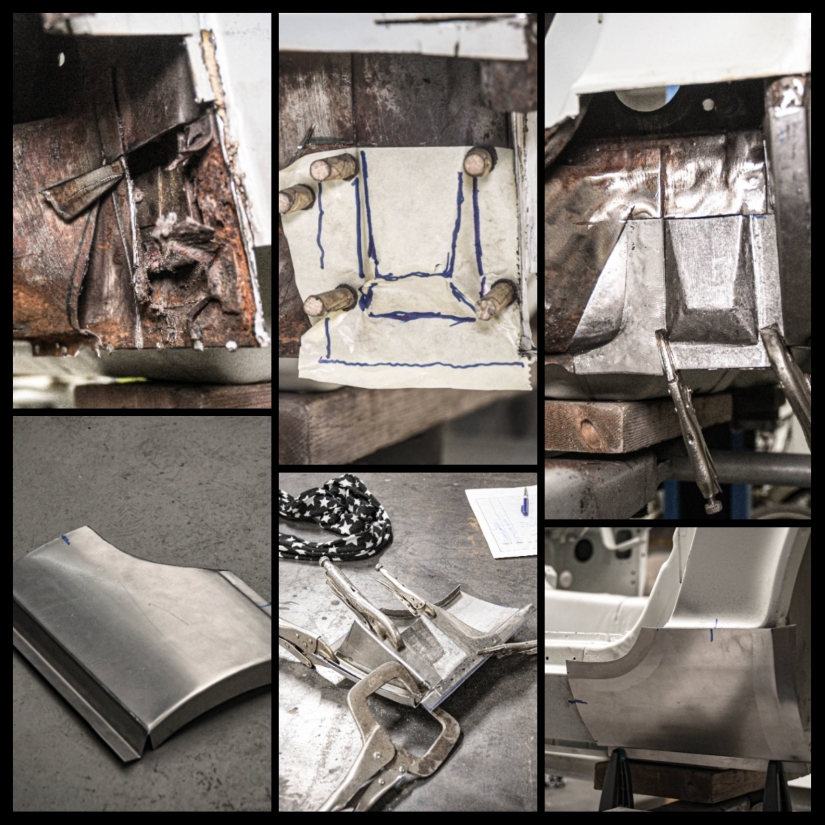
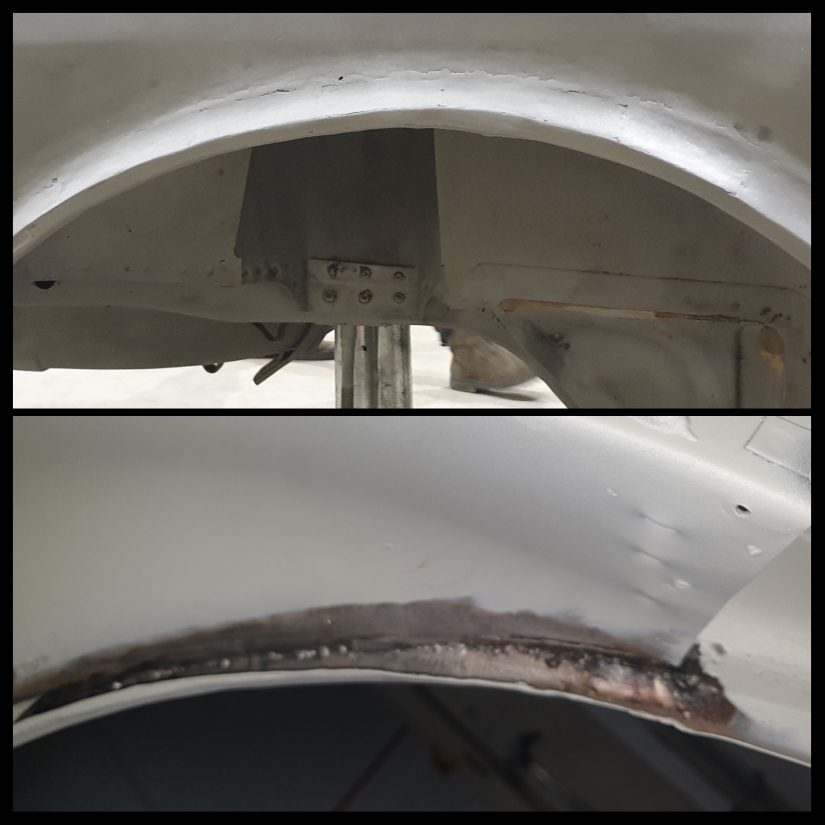
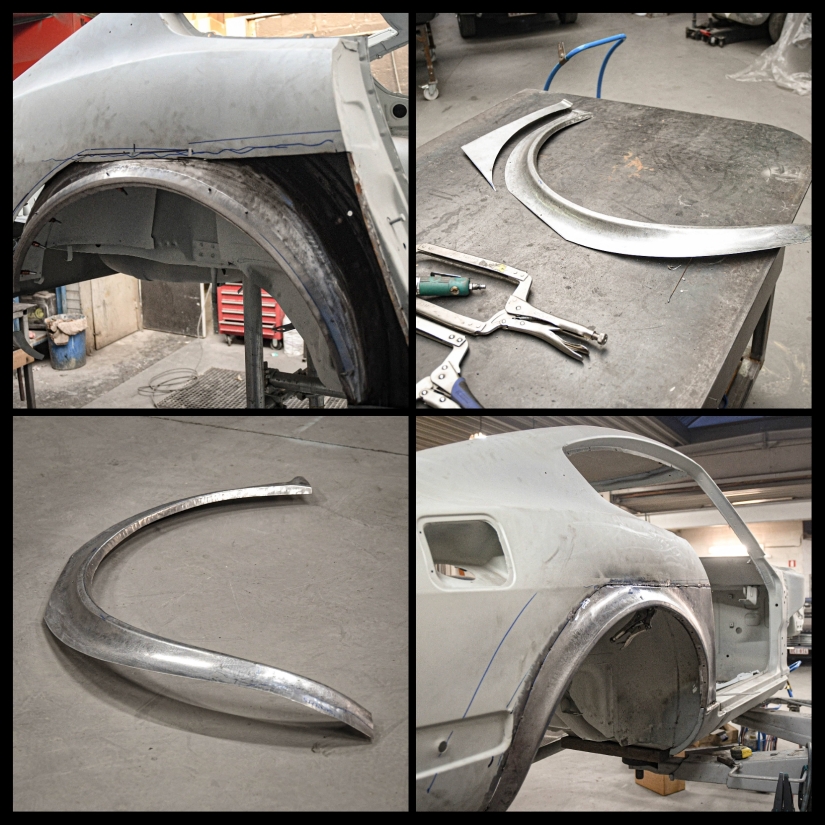
And now for the big one. As it turned out, the 240Z already had one rear wheel arch replace in it’s life. Unfortunately it wasn’t 100% right and we decided to replace it. From scratch, without any repair panels, never seen this much art and craftsmanship before! Big props to tristan for pulling this off!
How it was before
Be sure to watch the video below
some more frame rail repairs
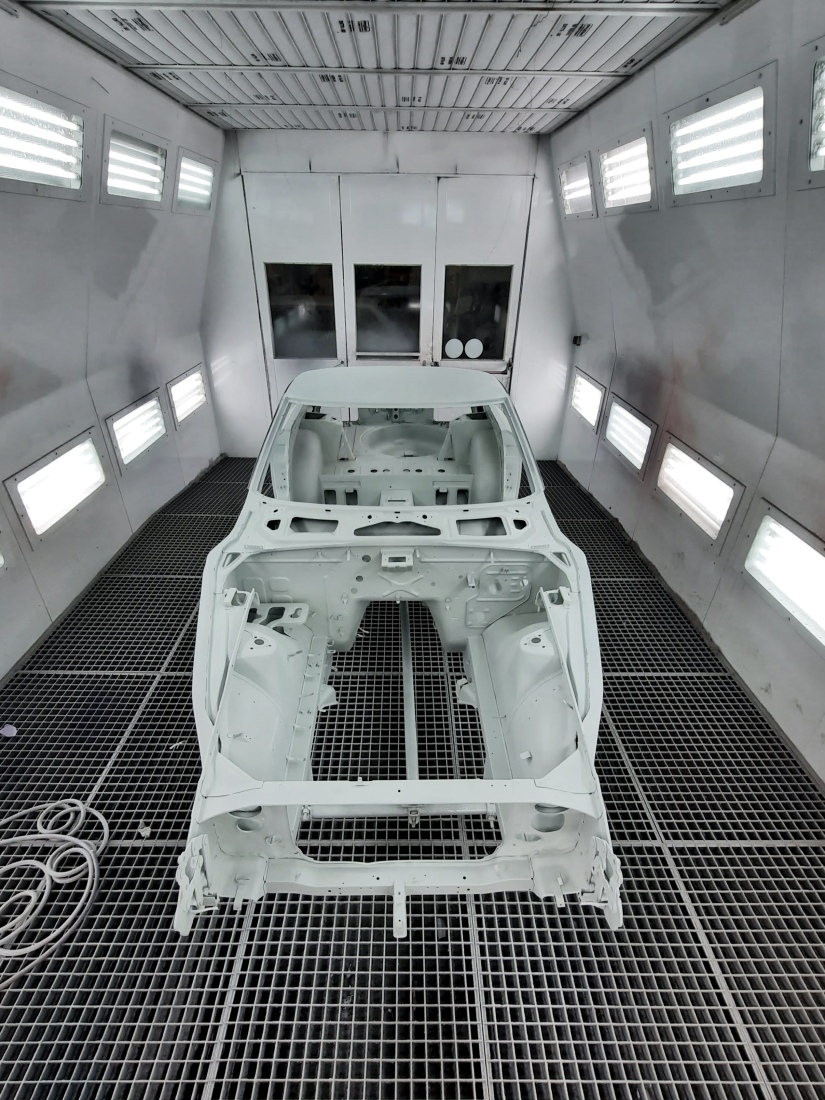
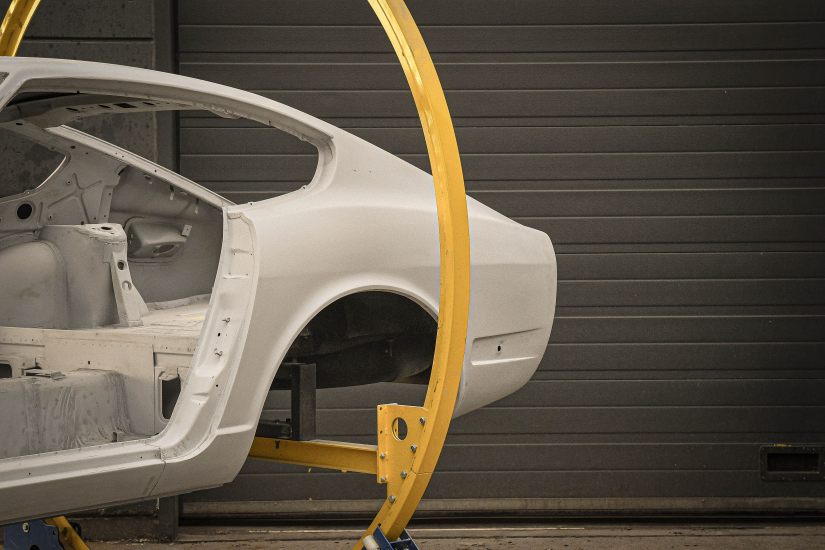
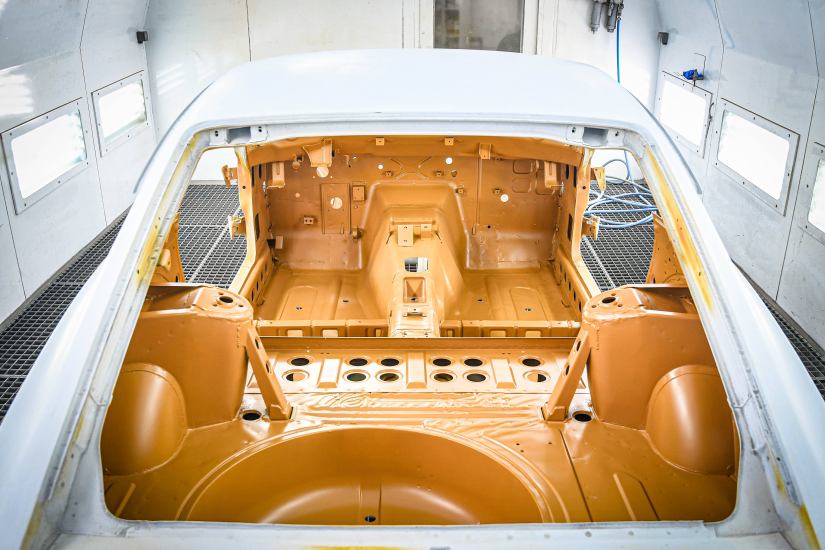
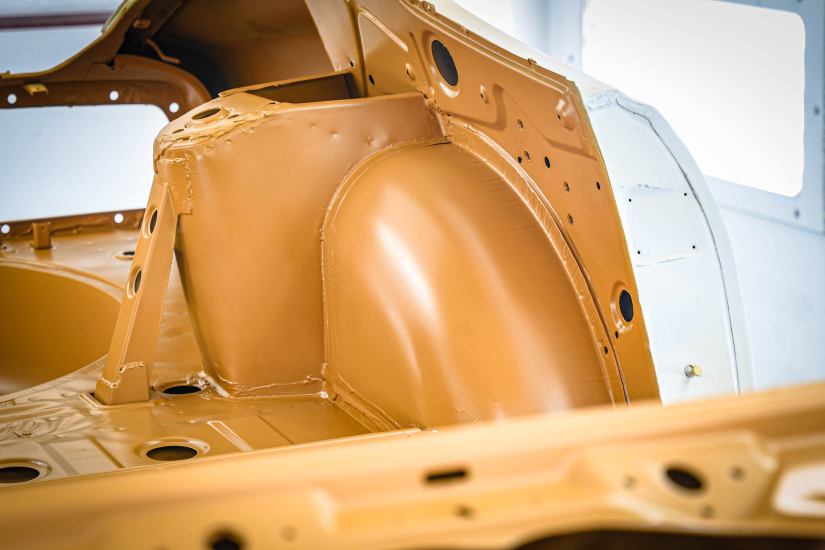
After all this it was time for prep and paint. Everything was done in 920 safari gold. I had got a sample from Lars K from Germany. Thanks again mate. That sample had travelled to another 240Z collector and been compared to an original paint 240Z. So I know the color is 100% right.
I chose a satin finish for the underside and the inside
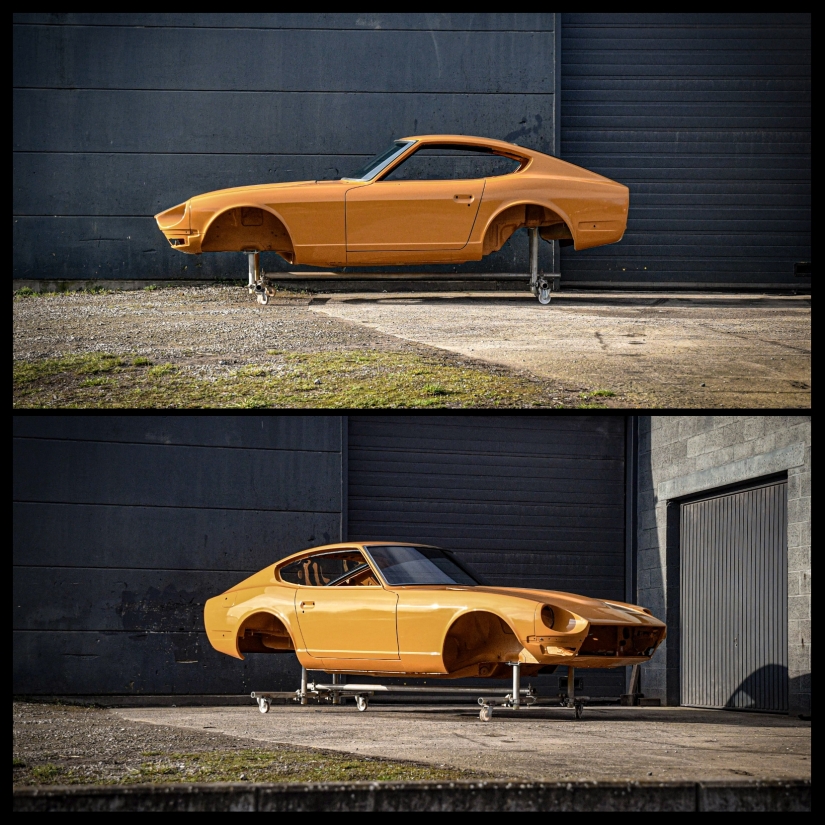
Well with all these pandemic things going on, it wasn’t that easy to get the shell back home to the shed. I wasn’t allowed to go to belgium to pick it up myself, so I had it delivered by a transport company. So I could finally see it with my own eyes, the color I never saw in person before. I decided to go with safari gold just by looking at pictures of it! But I have to say, I really don’t regret it. The color is awesome, looks so different with different lighting conditions. And it has to be one of the most 70’s colors from the 240Z color chart!
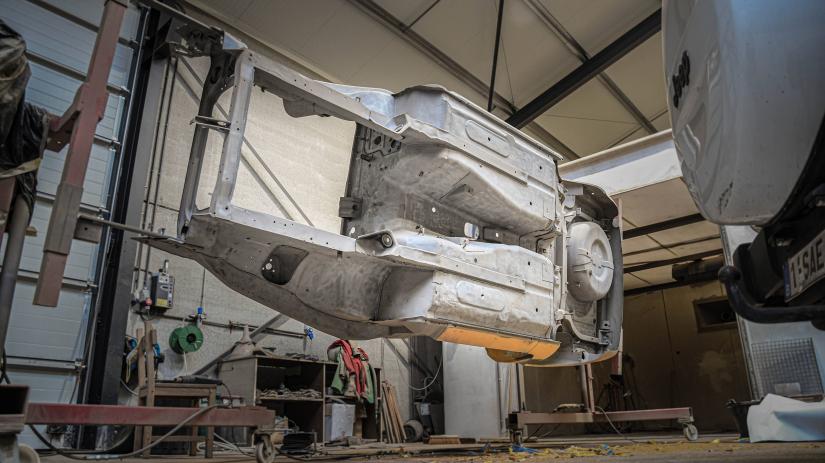
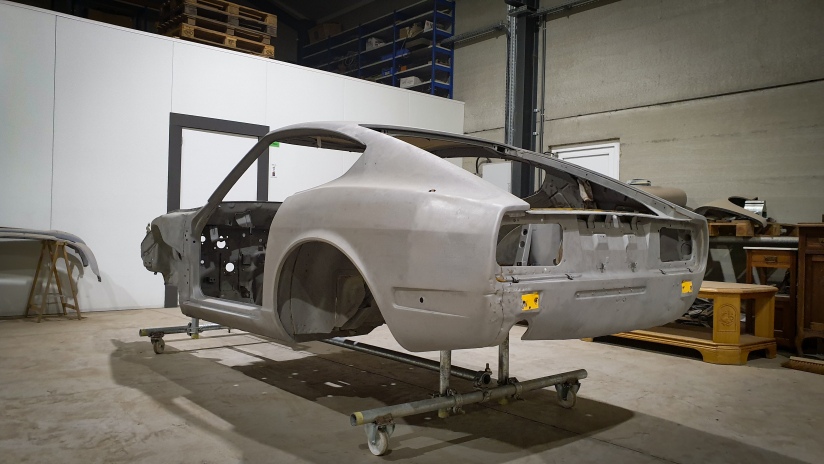
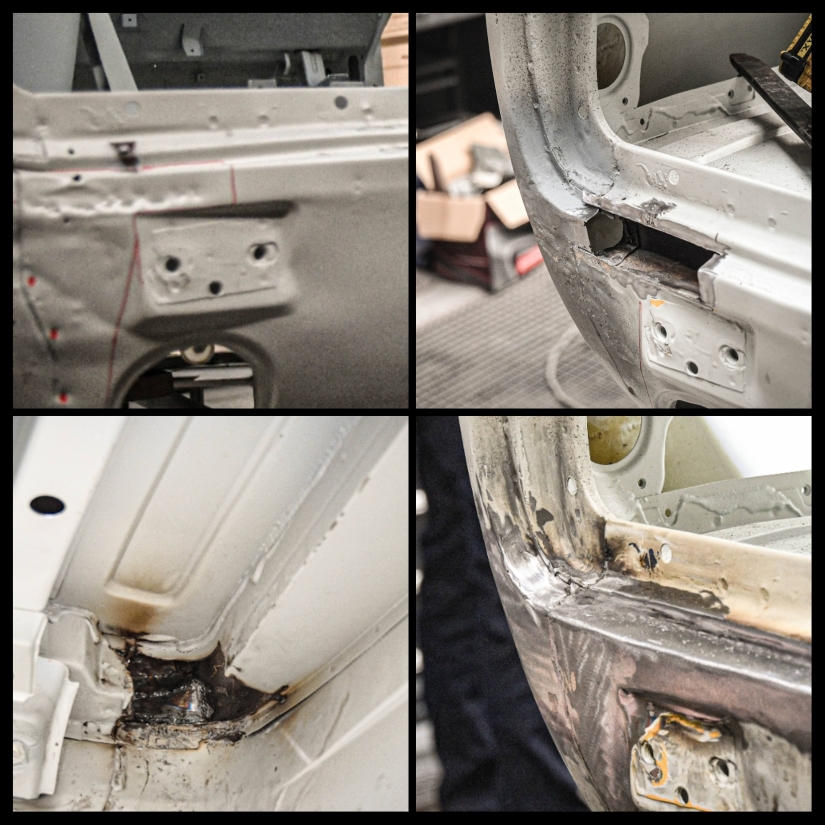
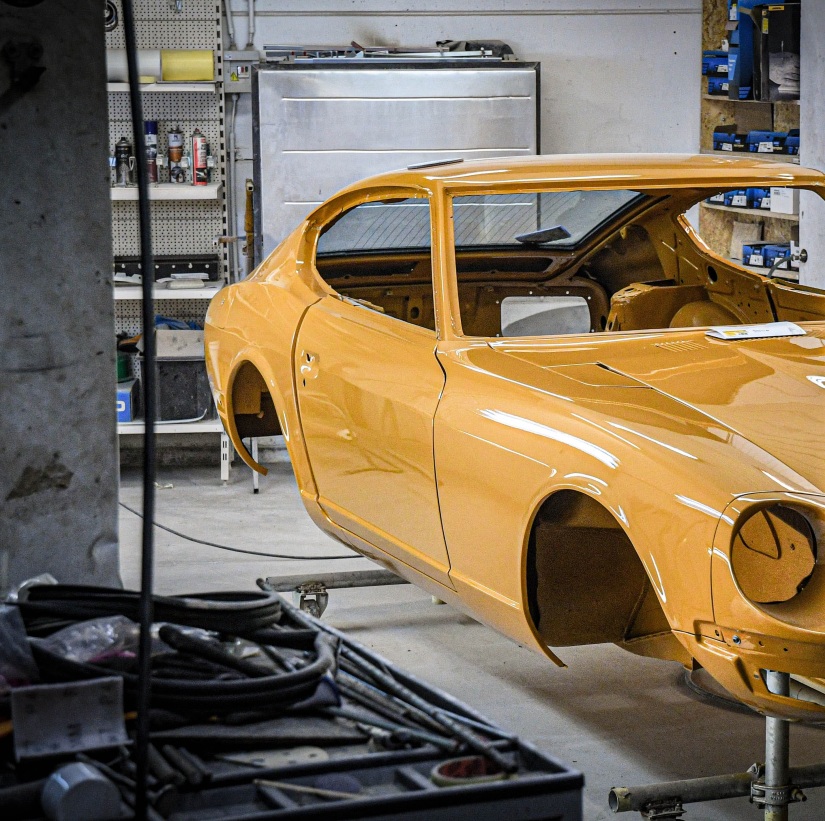
At a future date I will make a post abouth all the metal work that was needed. All I can say is that the guys (or should I say wizards) at SLG classiccars absolutely killed it. Their skills are beyond belief. Here is the car after 1 month of metal work and panel beating
The list of parts and assemblies to freshen up seems endless! Front suspension back together
Fuel tank looks good now too:
And I decided to have some wiring fun! Over 30 hours went into my adapted and modified harness. Or shoud I say harnesses, as there are 4. I used the original harness and modified it to have relays for lights, starter,… I rewired everything related to ignition. Adpated for the use of JDM/Euro spec tail lights, got rid of the way to complicated stock hazards wiring,… In the end I drew a new wiring diagram for future diagnose,…
In the beginning there was chaos:
But in the End I’m really satisfied with my job. Crossing fingers everything will work as intended 😉
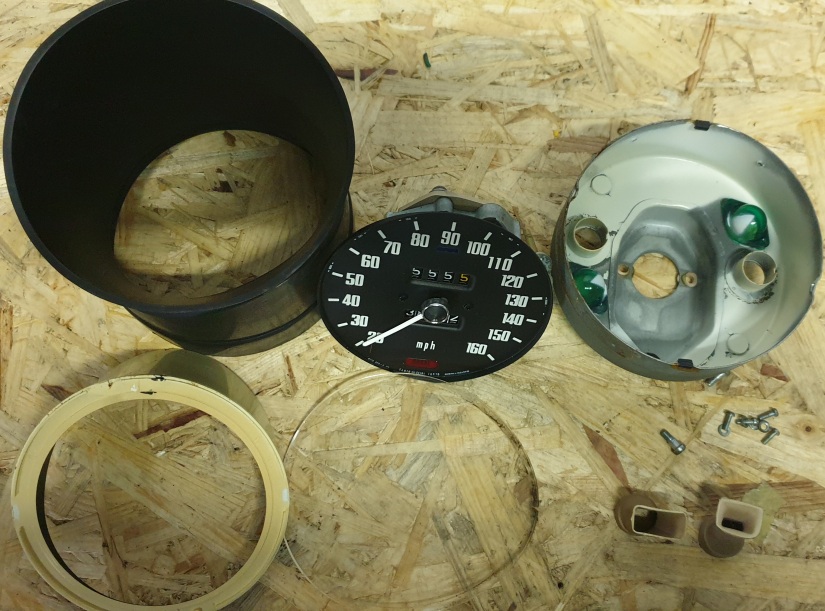
As the dash is out, I disassembled all the gauges, cleaned the up, polished the glas. Mediablasted an painted the housings, reassembled everything except for the tach. A Speedhut electronic tach with gps speedo will take the OEM units space.
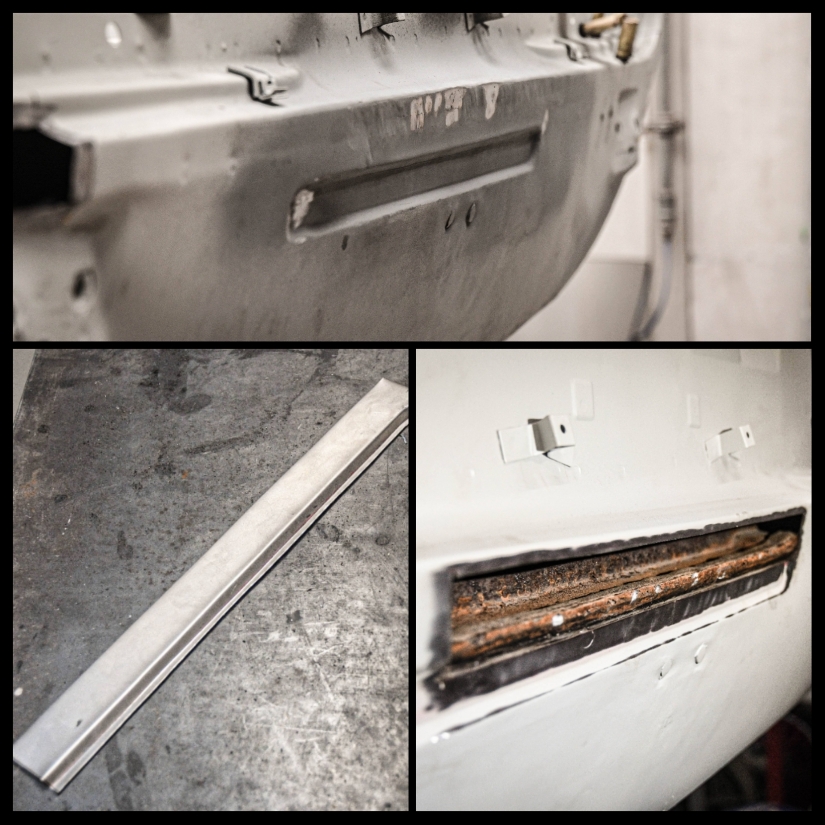
Next on the list the window scraper rubbers which were all brittle and disgusting. As I didn’t want to buy the expensive chrome trim with the attached rubber scrapers I decided to give it a try and just replace the stock scrapers on my existing trim
Another upgrade over stock is a Subaru STI LSD differential with a 3.9 final drive. So I bought the diff, bought some conversion axles from datsunrestomods and refreshed the diff. New gaskets, new hardware,…
Looks good now
Reassembled the rear suspension and brakes
Started my home made zinc plating again
Reassembled the wiper motor after cleaning everything
The shell was transported to a specialized media blasting company to remove all the layers of old paint, bondo, under sealing,… Nothing better than bare metal to start building a “new” car.
After I went to see and inspect it, the naked shell was then transported shortly after back to the resto shop where they instantly put in epoxy primer to prevent any oxidation while the works have to be done. All in all we found a few bad repair jobs, some minor rust spots,… Nothing major and nothing shocking. The guys at the resto shop are quite satisfied with what they have to work with.